EnCase EnScript to automate Internet Evidence Finder (IEF) for EnCase v6 & v7
In an effort to try and make the workflow easier for examiners, I have developed an Internet Evidence Finder EnScript for use with EnCase® v6 & v7. The goal of this EnScript is to make it easier for the examiner to launch an artifact search from within EnCase while they may be analyzing their case. IEF will run in the background and provide a familiar search status screen while it is searching and the examiner can continue working on their case in EnCase.
Once completed, the artifacts will be held in an IEF case file, just like if you had launched IEF the traditional way. In addition, once IEF has completed the search for artifacts, the EnScript provides the ability to copy the found artifact information back into EnCase as record data or into an Excel spreadsheet for additional review.
To install, simply copy the “Internet Evidence Finder.EnPack” to the appropriate folder, depending on the version of EnCase you are using. For EnCase v6 the typical location is:
C:\Program Files\EnCase6\EnScript\
or
C:\Program Files (x86)\EnCase6\EnScript\
For EnCase v7, the location typically is:
C:\Program Files\EnCase7\EnScript\
or
C:\Program Files (x86)\EnCase7\EnScript\
To run in EnCase v7, Choose “EnScript->Run” from to top menu bar, then select the EnScript (EnPack) you just copied into that folder.
For EnCase v6, double-click on the “Internet Evidence Finder” EnScript listed in the filter pane (lower-right).
Once the EnScript is run, you will be presented with the following dialog:

The first option equates to the “Search Type” option in IEF and defaults to “Full”. In the EnCase v7 EnScript, you are presented with three export options; None, EnCase Records or Excel Spreadsheet. These options do not exist in the EnCase v6 EnScript. “None” means the data found by IEF will be stored inside an IEF case file and can always be viewed by using IEF. The “EnCase Records” option means a copy of the found data will be exported from IEF and placed inside the EnCase Records tab for the current case. The last option of “Excel Spreadsheet” means a copy of the found data will be exported from IEF and placed inside an Excel Spreadsheet with each artifact type getting its own worksheet. The IEF case file and data are created and stored in the case’s default export folder.
The next option determines if you want the EnScript to automatically launch the IEF viewer and load the found artifacts so you can immediately review them in IEF.
The fourth option determines the types of artifacts you want IEF to search for.
Any text in the case notes is automatically transferred to IEF and entered into the IEF Case file. In addition, the examiner name and evidence number (EnCase v7) are automatically pulled from the EnCase case information when the case was initially created.
The final two options specify where the IEF.EXE and IEFRV.EXE files are. These two files are needed in order to launch IEF in the background and later load the case data, if selected. Once initially entered, this information remains each time you run the EnScript.
Once you click “OK”, you are presented with an evidence list where you can select which pieces of evidence you would like to process.

Once run, IEF will launch in the background and process all the evidence files you selected. An IEF status screen will be displayed:

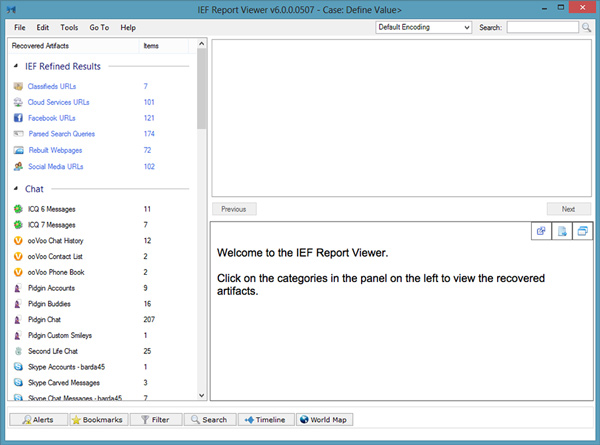
If you selected the option to have IEF Report Viewer launch, the case will be automatically loaded and displayed in the report viewed once complete.
If you chose the export option to have the data exported into EnCase Records, you will see this from the Evidence pane in EnCase v7:

Clicking on that LEF will load the records in the records tab of EnCase:

You can then view the found IEF artifact data the same way as you view other data stored in the EnCase Records structure and build custom filters/conditions to identify specific artifacts. You can always view the IEF data natively in IEF Report Viewer by double-clicking the IEFv6 case file stored in the default export folder of the case.
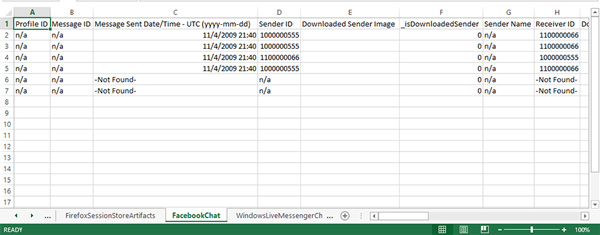
If you chose the “Excel Spreadsheet” export option, Excel (required) will automatically start and display the artifacts with each category of artifact on a separate worksheet. By default the XLS file is automatically saved in the default export folder of the case along with the IEF case file and other associated data.
As always, if you have any comments, suggestions or questions,
you can contact me directly at: lance (at) magnetforensics.com
you can contact me directly at: lance (at) magnetforensics.com


 ShareThis


10 comments:
Nice start for you with the IEF team. I'm a great "fan" of IEF and use it at almost every case. At this point i only can choose a whole group instead of items. (as in the picture showe above). Maybe in an IEF enscript version 2 ?.
Ronald Koenders
Amsterdam police
the netherlands.
Hi Ronald,
There are currently no plans to allow you to choose specific artifacts from the API. IEF is constantly adding new artifacts and then it becomes too much of a moving target. The API currently allows you to select categories of artifacts (i.e. P2P, chat, etc) , which still allows you to limit the scope of what is searched for, if needed, but also allows and easy to maintain API.
Great job, but there is a bug ...
IEF_v1_EnCase_v7.EnPack (54): "OPTION_GROUPBOX" is an unknown identifier
in EnCase 7.05
@Anon,
This is not a bug. Guidance made made a change in the way dialogs are displayed starting in version 7.06. Please update to the latest version of EnCase.
Love the script. Unless I'm missing something I can't figure out how to see the column in the table pane and therefore create a condition to filter etc. Any suggestions?
Paul,
1. Create a new condition
2. Click on the “Filters” tab in the “New Condition” dialog
3. Double click on the “DataPropertyRoot” Properties object
4. Type a name
5. Right-click on the “Main” object and choose “new”
6. Select “text” for properties, “contains” for operator and select the “Prompt for value” box, then click ok.
7. OPTIONAL – Add another by right-clicking on main and this time choose “name” as the property and “contains” as the operator and prompt for value again. This will allow you to look for text in a specific field. Once you have added this second criteria, be sure and right-click on main and choose “change logic” so it says AND instead of OR (default).
8. Click “ok” on the new filter dialog
9. Click on the “conditions” tab back on the initial “New condition” dialog
10. Right-click on “main” and choose “new”
11. Scroll to the bottom of the properties list and you should see the filter you created with whatever name you gave it. Select that object.
12. Select the “equal to” operator
13. Double click on “true” to have it populate the “Value” field
14. Click “ok”
15. Click “ok” to close the new condition dialog
Hi
i have encountered some problems while writing some enscript regarding the c.EntryRoot(). Does this still work in version 7 of enscript or has this changed?
@Anonynous-
Be sure and use the v7 version of the EnScript.
Hi Lance
I am trying to write a new script to count the number of files with a specific file extension and display the result in an excel sheet.I met an error saying string is an unknown identifier. Do u mind to tell me how to solve the error? i referenced from the dispatch class and file type class. below is my code
@Anon,
Can you send it to my email address lance (at) forensickb(dot)com? The code you posted did not entirely come through.
Lance
Post a Comment